So I built a small E-ink (ESP32) info screen for the front door.
Link to the original blog post with a nice text & pictures layout.
The problem:
When leaving the house, it’s nice to see some information displayed at the door, like temperatures, weather and messages for the kids etc.
Actually, there is no problem. I just like to tinker so I invented a problem.
The solution:
I’ve tried to build #esp32 powered e-ink display several months ago and I failed:
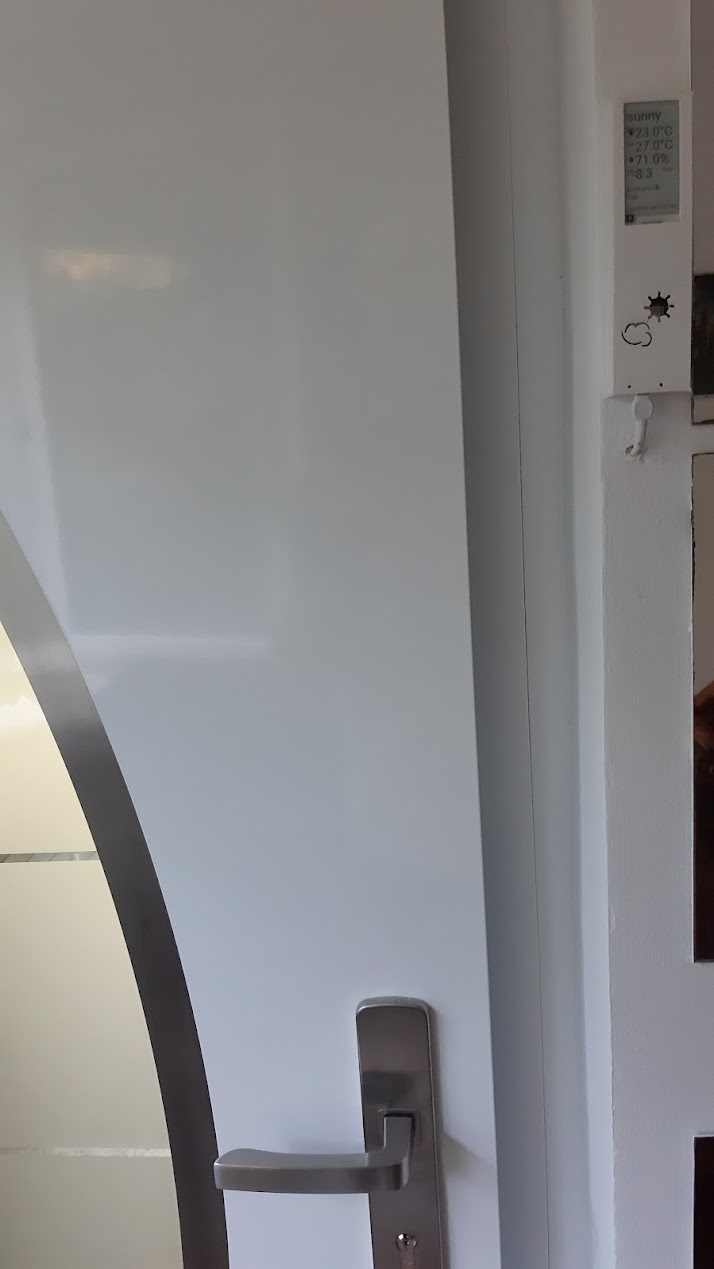
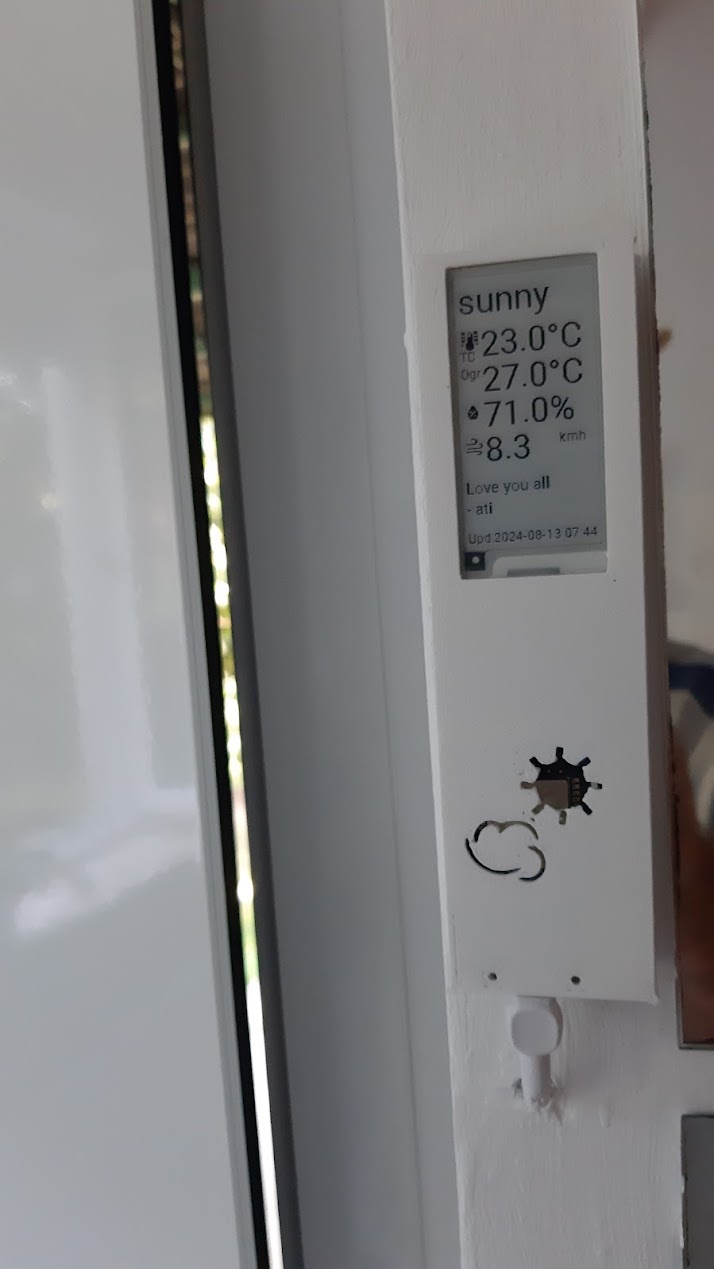
Now I finally finalized the build and installed it at the front door. It looks like this:
Electronics
After previous failures with the e-ink display and esp32 board I ordered new displays and the board.
I couldn’t find the integrated board with the display, so I ordered them separated:
- Universal e-ink driver board with longer cable and adapter (from Aliexpress)
- 250×122, 2.13inch E-Ink raw display panel (from Waveshare)
Case
There was no suitable case for this board and separated display so I designed and 3D printed a new one:
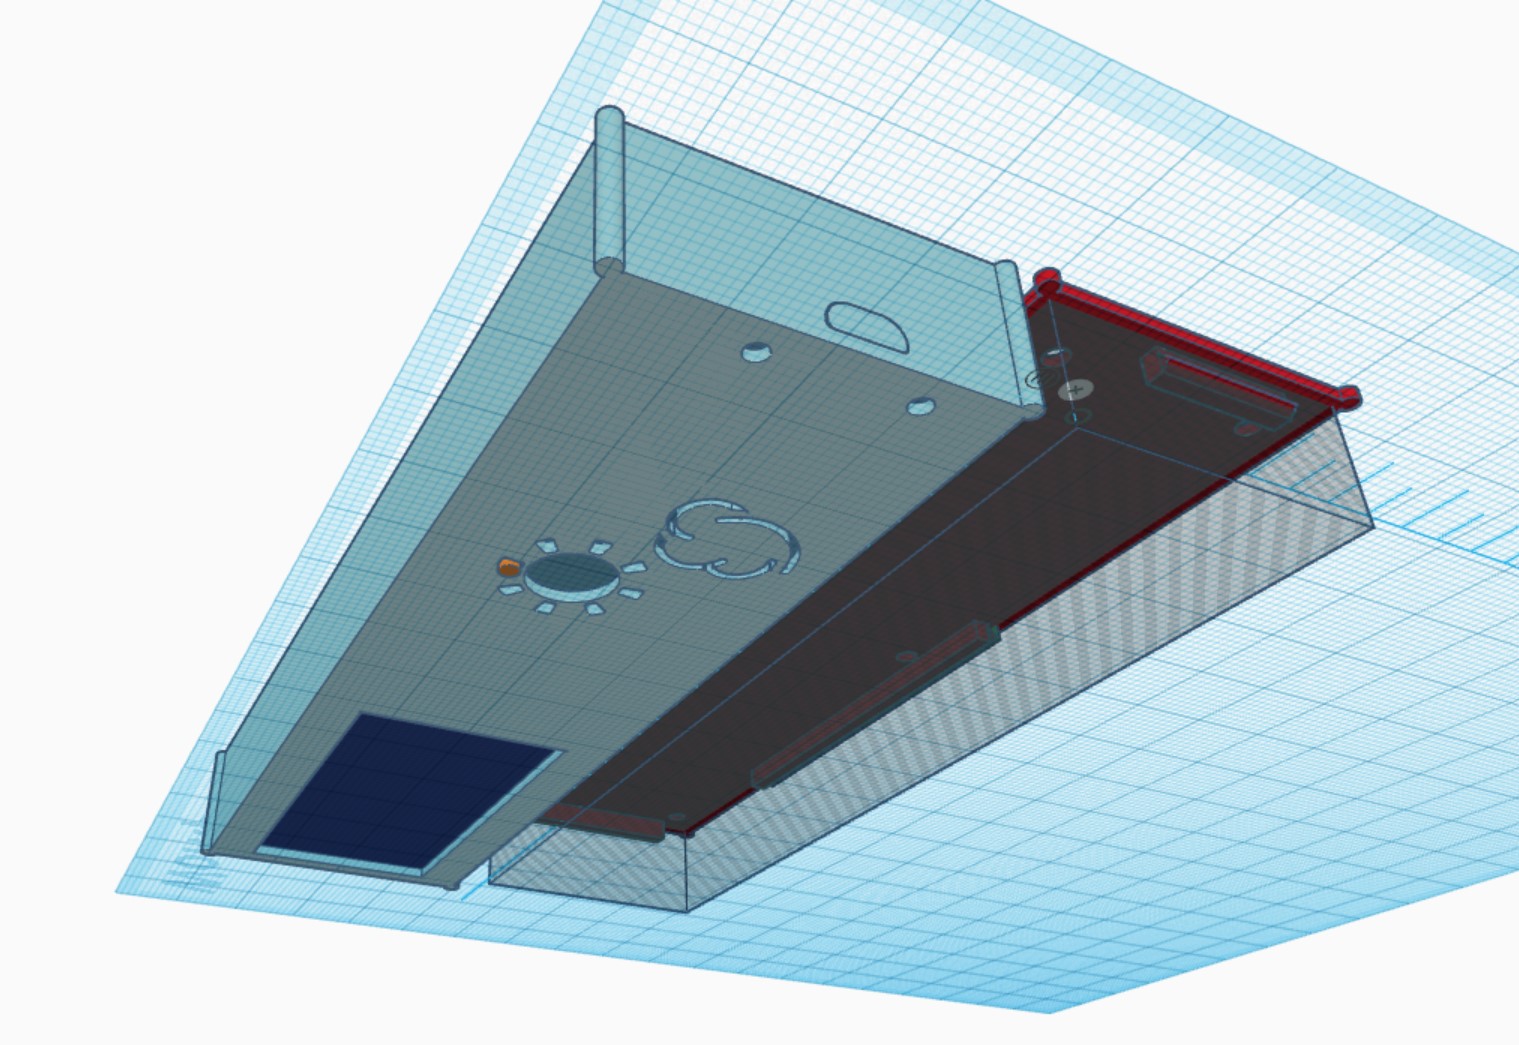
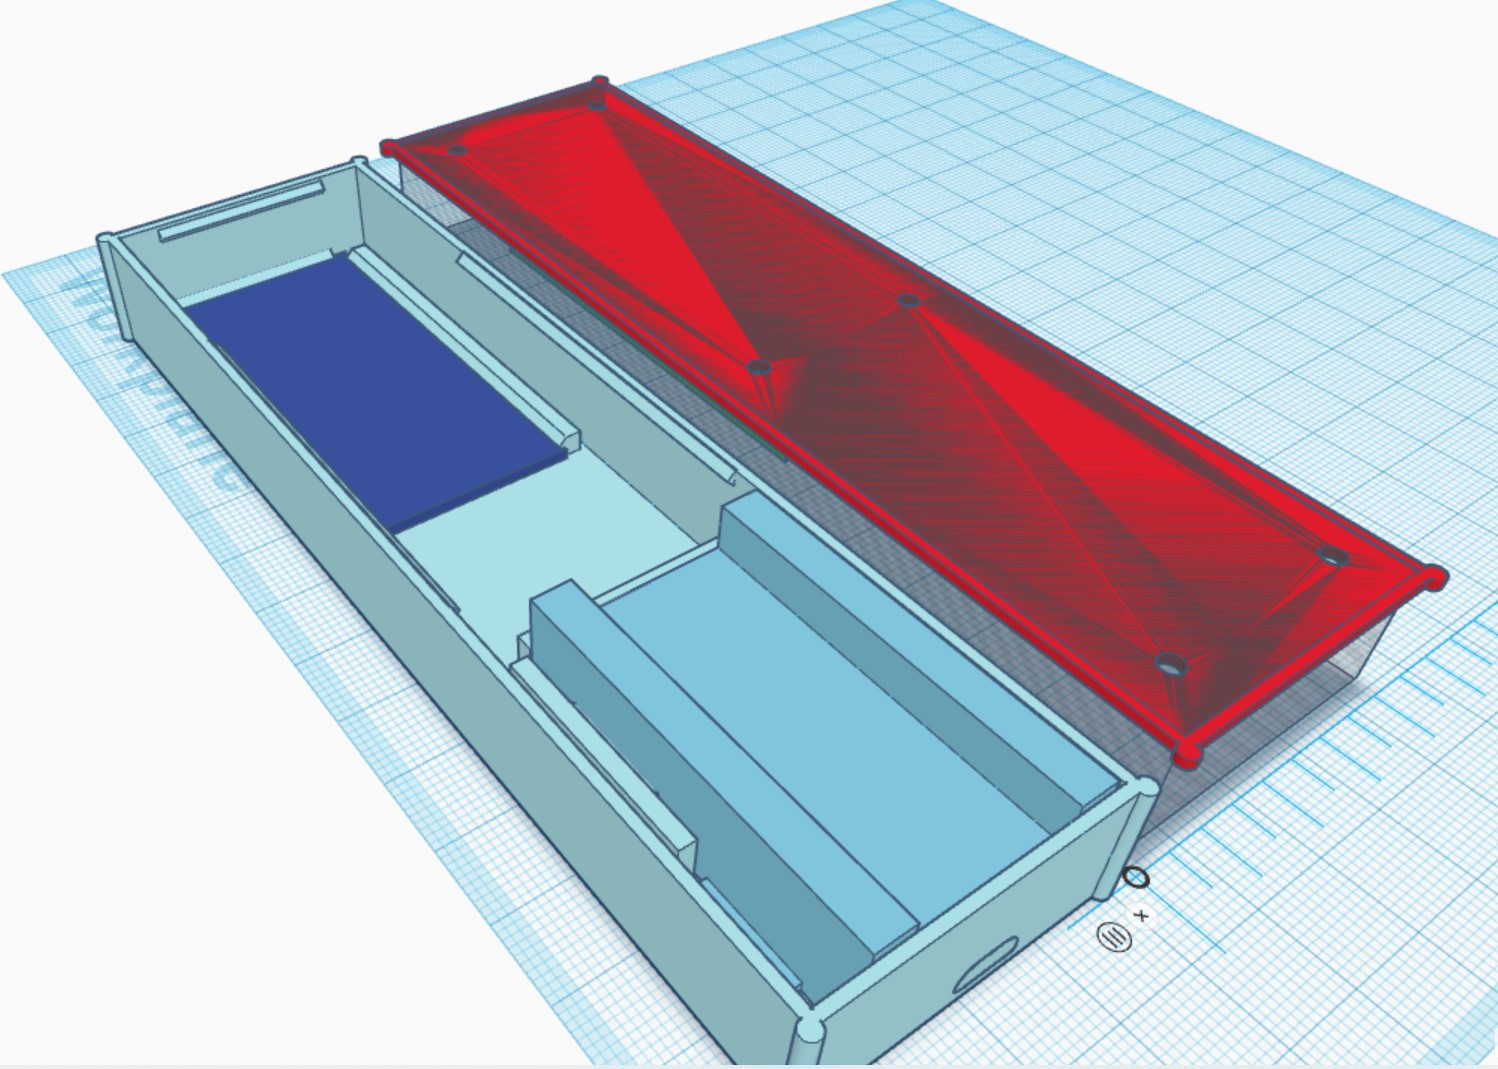
The case has snappable lid for quick assembly-dissasembly. I used white PLA filament for printing.
ESPHome code
The ESPHome YAML code below is a modification of the following code:
- Paul-Vincent Roll github code (source),
- Stephan Wijman’s Blog (source) and
- Madalena’s Weatherman Dashboard for ESPHome (source).
Thanks guys! Without your code, I would never figure it out.
My modification’s: adaptation for a smaller display (2.13”), different refresh logic and my specific Home Assistant sensors.
- part: definition of global variables
# Global variables for detecting if the display needs to be refreshed. (Thanks @paviro!)
globals:
  - id: data_updated
    type: bool
    restore_value: no
    initial_value: 'false'
  - id: initial_data_received
    type: bool
    restore_value: no
    initial_value: 'false'
  - id: recorded_display_refresh
    type: int
    restore_value: yes
    initial_value: '0'
No changes to the original code here.
2. part – script for updating the screen
# Script for updating screen - Refresh display and publish refresh count and time. (Thanks @paviro!)
script:
  - id: update_screen
    then:
      - lambda: 'id(onboard_led).turn_on();'
      - lambda: 'id(data_updated) = false;'
      - component.update: eink_display
      - lambda: 'id(recorded_display_refresh) += 1;'
      - lambda: 'id(display_last_update).publish_state(id(homeassistant_time).now().timestamp);'

      - lambda: 'id(onboard_led).turn_off();'
Changes from the original code: turning on and off onboard LED when refreshing display.
3. part – function that periodically check if the screen needs to be udpated
# Check whether the display needs to be refreshed every 10 minutes,
# based on whether new data is received or motion is detected. (Thanks @paviro!)
time:
  - platform: homeassistant
    id: homeassistant_time
    on_time:
      - seconds: 0
      #changed from /1 to /10
        minutes: /10
        then:
          - if:
              condition:
                lambda: 'return id(data_updated) == true;'
              then:
                - if:
                    condition:
                      binary_sensor.is_on: motion_detected
                    then:
                      - logger.log: "Sensor data updated and activity in home detected: Refreshing display..."
                      - script.execute: update_screen
                    else:
                      - logger.log: "Sensor data updated but no activity in home - skipping display refresh."
              else:
                - logger.log: "No sensors updated - skipping display refresh."
Changes from the original code: I’ve increased update interval to 10 minutes to lower the number of refreshes.
4. part – init
esphome:
  name: ${name}
  friendly_name: ${friendly_name}
  min_version: 2024.6.0
  name_add_mac_suffix: false
  project:
    name: esphome.web
    version: '1.0'
  on_boot:
      priority: 200.0
      then:
        - component.update: eink_display
        - wait_until:
            condition:
              lambda: 'return id(data_updated) == true;'
              # Wait a bit longer so all the items are received
        - delay: 5s
        - logger.log: "Initial sensor data received: Refreshing display..."
        - lambda: 'id(initial_data_received) = true;'
        - script.execute: update_screen
No updated of the original code here.
5. part – load fonts
#load fonts from HA server, \config\esphome\_fonts\Roboto-Regular.ttf
font:
  - file: "_fonts/Roboto-Regular.ttf"
    id: roboto_small
    size: 12

  - file: "_fonts/Roboto-Regular.ttf"
    id: roboto
    size: 15

  - file: "_fonts/Roboto-Regular.ttf"
    id: roboto2
    size: 32

  - file: "_fonts/materialdesignicons-webfont.ttf"
    id: material2
    size: 32
    glyphs:
      - "\U000F0510" # mdi:thermometer-lines
      - "\U000F058E" # mdi:water-percent
      - "\U000F059D" # mdi:weather-windy

  - file: "_fonts/materialdesignicons-webfont.ttf"
    id: material
    size: 20
    glyphs:
      - "\U000F0510" # mdi:thermometer-lines
      - "\U000F058E" # mdi:water-percent
      - "\U000F059D" # mdi:weather-windy
6. part – e-ink init and information display. These settings work for my display:
#for display
spi:
  clk_pin: 13
  mosi_pin: 14

#cs_pin: 5 dc_pin: 17 busy_pin: 4 reset_pin: 16, update 10s, full 12
display:
  - platform: waveshare_epaper
    id: eink_display
    cs_pin: 15
    dc_pin: 27
    busy_pin: 25
    reset_pin: 26
    #model: 2.90inv2
    #model: 2.13in-ttgo-b74
    model: 2.13in-ttgo-b74
    reset_duration: 2ms
    update_interval: never
    full_update_every: 1
    rotation: 0

#    it.printf(0, 0, id(roboto_small), "Weather: %s", id(outside_weather).state.c_str());

    lambda: |-

      it.printf(0, 0, id(roboto2), "%s", id(outside_weather).state.c_str());
      ESP_LOGD("custom", "Forecast: %s", id(outside_weather).state.c_str());

      it.printf(0, 45, id(material), "\U000F0510");
      it.printf(20, 40, id(roboto2), "%.1f°C", id(outside_temperature).state);
      it.printf(0, 62, id(roboto_small), "TC");

      it.printf(0, 78, id(roboto_small), "Ogr.");
      it.printf(20, 73, id(roboto2), "%.1f°C", id(outside_temperature_button).state);

      it.printf(0, 111, id(material), "\U000F058E");
      it.printf(20, 106, id(roboto2), "%.1f%%", id(outside_humidity).state);

      it.printf(0, 144, id(material), "\U000F059D");
      it.printf(20, 139, id(roboto2), "%.1f%", id(outside_wind).state);
      it.printf(90, 144, id(roboto_small), "kmh");
      ESP_LOGD("custom", "Wind: %f", id(outside_wind).state);

      it.printf(0, 185, id(roboto), "%s", id(greeting1).state.c_str());
      it.printf(0, 205, id(roboto), "%s", id(greeting2).state.c_str());

      it.printf(0, 235, id(roboto_small), "Upd:");
      it.strftime(25, 235, id(roboto_small), "%Y-%m-%d %H:%M", id(homeassistant_time).now());
7. part: get numeric sensor data from Home Assistant
Temperatures from 2 sensors, weather from Weather integration.
# Pull data from Home Assistant
#from toplotna
  - platform: homeassistant
    name: "Outside temperature Sensor From Home Assistant"
    id: outside_temperature
    entity_id: sensor.toplotna_outside_temperature
    on_value:
      then:
        - lambda: 'id(data_updated) = true;'

#from Aqara button
  - platform: homeassistant
    name: "Outside temperature Aqara button Sensor From Home Assistant"
    id: outside_temperature_button
    entity_id: sensor.aqara_button_01_device_temperature
    on_value:
      then:
        - lambda: 'id(data_updated) = true;'

# from weather integration
  - platform: homeassistant
    name: "Outside humidity from Home Assistant"
    id: outside_humidity
    entity_id: weather.forecast_morje
    attribute: humidity
    on_value:
      then:
        - lambda: 'id(data_updated) = true;'

  - platform: homeassistant
    name: "Wind from Home Assistant"
    id: outside_wind
    entity_id: weather.forecast_morje
    attribute: wind_speed
    on_value:
      then:
        - lambda: 'id(data_updated) = true;'
This code is specific to my sensors and HA.
8. part – sensors related to e-ink updating
# Create sensors for monitoring Weatherman remotely.
  - platform: template
    name: "Weatherman - Display Last Update"
    device_class: timestamp
    entity_category: "diagnostic"
    id: display_last_update

  - platform: template
    name: "Weatherman - Recorded Display Refresh"
    accuracy_decimals: 0
    unit_of_measurement: "Refreshes"
    state_class: "total_increasing"
    entity_category: "diagnostic"
    lambda: 'return id(recorded_display_refresh);'
No changes to the original code.
9. Misc switches: onboard LED and for restarting ESP32
switch:
  # General pin 19->15
  - platform: gpio
    name: "${esphome_name} - Onboard LED"
    pin: 2
    id: onboard_led

  - platform: restart
    name: "${esphome_name} - Restart"
    id: restart_switch
10. Text sensors – weather and user defined notes to be entered in HA and displayed on e-ink
text_sensor:
- platform: homeassistant
    name: "Current weather from Home Assistant"
    id: outside_weather
    entity_id: weather.forecast_morje
    on_value:
      then:
        - lambda: 'id(data_updated) = true;'

  - platform: homeassistant
    name: "Greeting 1"
    id: greeting1
    entity_id: input_text.vhod_greeting
    on_value:
      then:
        - lambda: 'id(data_updated) = true;'

  - platform: homeassistant
    name: "Greeting 2"
    id: greeting2
    entity_id: input_text.vhod_greeting_2
    on_value:
      then:
        - lambda: 'id(data_updated) = true;'
This code is specific for my HA and sensors. Replace ‘weather’ with your weather integration and input_text.xxxxx with your input fields (helpers) in HA.
11. Binary sensor – presence detection and e-ink priority updates
# Check if motion is detected in the living room.
binary_sensor:
  - platform: homeassistant
    entity_id: binary_sensor.ikea_motion_03_occupancy
    id: motion_detected
    on_press:
      then:
        - lambda: 'id(onboard_led).turn_on();'
        #check if data is updated, then refresh immediately, don't wait 1 min (time function above)
        - if:
            condition:
                lambda: 'return id(data_updated) == true;'
            then:
              - logger.log: "Priority refresh from motion detection sensor & data was updated..."
              - script.execute: update_screen
    on_release:
      then:
        - lambda: 'id(onboard_led).turn_off();'
This code is specific for my HA and sensors. Replace ‘binary_sensor.ikea_motion_03_occupancy’ with your motion detection sensor.
This code updates e-ink if the sensor detects presence and if there is a fresh data from HA.
The original code doesn’t include this kind of priority update. The original code (from Weatherman) updates the screen every minute if there is a fresh data. This was too slow for me. If I stand in front of the display I want a fresh data immediately and waiting is not acceptable.
The next minor change is blinking onboard LED if there is a motion detected.
12. Misc functions for controlling ESP (restart, shutdown, update screen)
button:
  - platform: shutdown
    name: "Weatherman - Shutdown"

  - platform: restart
    name: "Weatherman - Restart"

  - platform: template
    name: "Weatherman - Refresh Screen"
    entity_category: config
    on_press:
      - script.execute: update_screen
No changes to the original code.
I omitted the code for WIFI and other usual ESPHome functions (IPs, uptime sensors etc.).
Here’s how it looks like in Home Assistant:
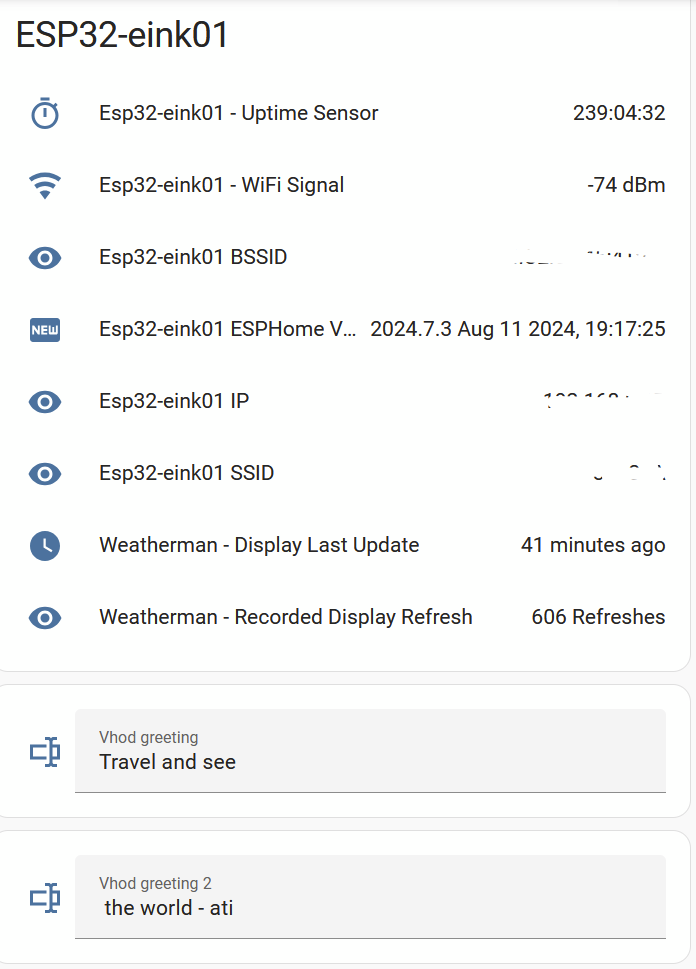
The image above also shows 2 input text fields. These texts are displayed on e-ink display. So I can entertain kids with various dad jokes everytime they leave the house.
I’m also interested how many times e-ink display refreshes:
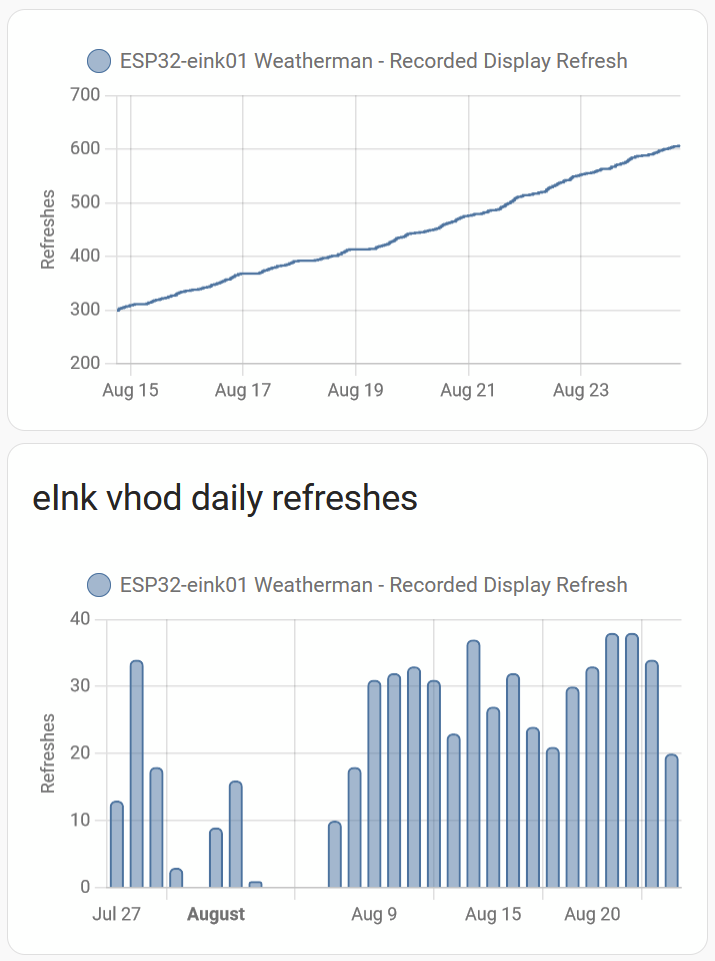
The number of refreshes is between 20-35 refreshes per day (10 000 per year). Why is a low number of refreshes important? E-ink displays have limited life expectancy. I read it’s around 1 000 000 refreshes for this particular display (see source). Therefore it should last 100 years at my current refresh rate.
This sounds a lot, right?
But what if I refreshed the display only every minute (e. g. to display time)? Then it would probably die after 2 years.
The official specification of e-ink display
Misc
The biggest effort was to mount the USB cable in the wall. I chiseled the wall, inserted the cable and then plastered/painted it. See the first picture – the cable is coming out of a wall under the mounted case.
Conclusions/Key takeaways
- It’s a fun project,
- the displayed info will probably change in time to display other relevant info
- the screen is small and I have to think hard which information is worth displaying. I didn’t find the optimal info yet.
Disclaimer
The links to the products are not affiliate links and I don’t receive any compensation for linking.
The code and the ideas are mostly from HomeAssistant and ESPHome community forums (referenced above).
Hashtags: #eink #esphome #esp32 #homeassistant #diy #case #3dprinting
Leave a Reply