I had this #esp32 #lilygo board* laying in the drawer for more than 2 years. I tried several times to make the e-ink display work without success.
Today I flashed it again with the latest #esphome firmware, stole some code from the web, tinkered for 2 hrs with #yaml and lambdas and whatnot and suddenly… it’s alive!**
(*not affiliated with any vendor, just randomly buying stuff from China)
(** alive means: it shows values of sensors from the HA server, this board has ‘only’ a display, but no sensors)
The procedure
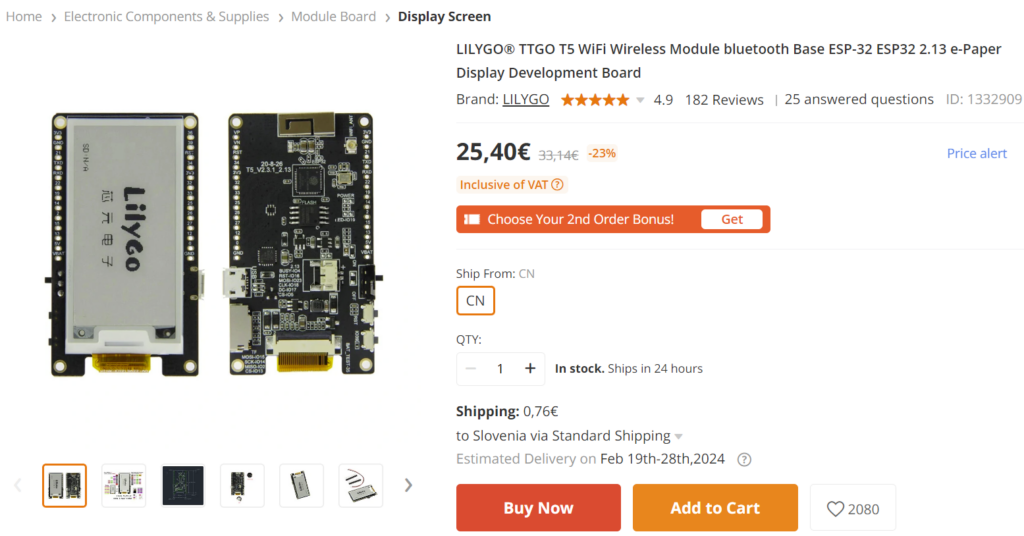
I bought this board from Banggod: LILYGO® TTGO T5 WiFi Wireless Module bluetooth Base ESP-32 ESP32 2.13 e-Paper Display Development Board
It’s a thin ESP32 board with an attached e-ink display.
- I connected it to the computer via USB, then flashed it with ESPHome via #HomeAssistant. Nothing special here. Maybe I had to hold the ‘boot’ button to flash it for the first time, I don’t remember exactly, each ESP board has it differently.
- I searched if somebody succeeded using this display in ESPHome and yes, of course:
- Fonts:
- Searched for Roboto-Regular.ttf font, found it on Google Fonts, downloaded it,
- connected to my HA server using HA Samba Share add-on,
- copied fonts to folder on HA server, path: \config\esphome\_fonts
- Edited ESPHome yaml from Home Assistant
- Reused the code from the examples above and after a bit of trial-and-error I hit the right display model.
The code that works for me:
(skipping the wifi and other initialization code )
Fonts:
Firstly, we have to load fonts to the ESP board:
#load fonts from HA server, \config\esphome\_fonts\Roboto-Regular.ttf
font:
  - file: "_fonts/Roboto-Regular.ttf"
    id: roboto
    size: 15

  - file: "_fonts/Roboto-Regular.ttf"
    id: roboto2
    size: 32
I have 2 definitions for fonts, the only difference is size (15 and 32px). Will need them later at it.printf… command.
Display definition and output (bolded models work for me):
#for display
spi:
clk_pin: 18
mosi_pin: 23
display:
- platform: waveshare_epaper
cs_pin: 5
dc_pin: 17
busy_pin: 4
reset_pin: 16
#model: 2.90inv2
model: 2.13in-ttgo-b74
update_interval: 1min
full_update_every: 30
rotation: 270
lambda: |-
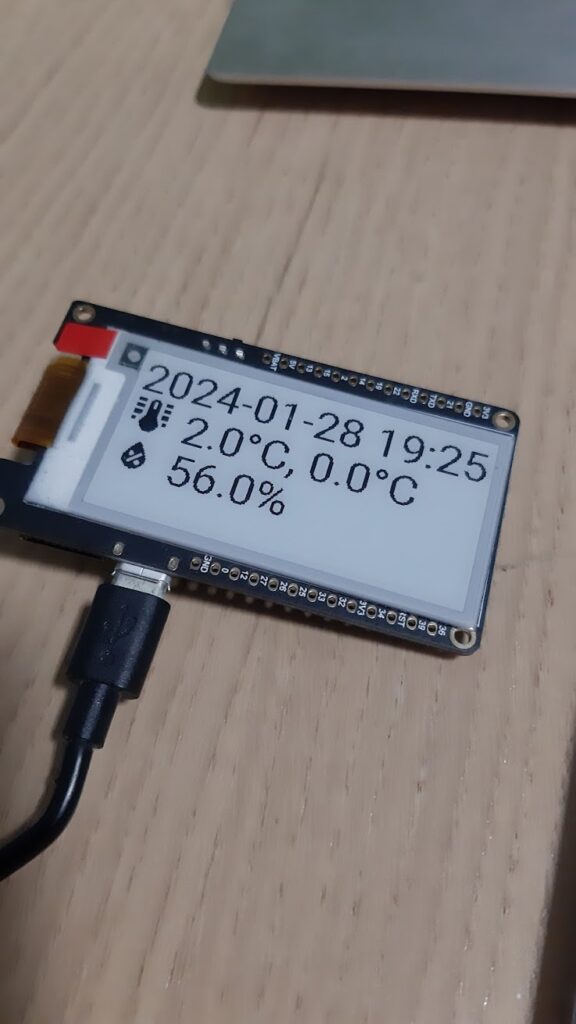
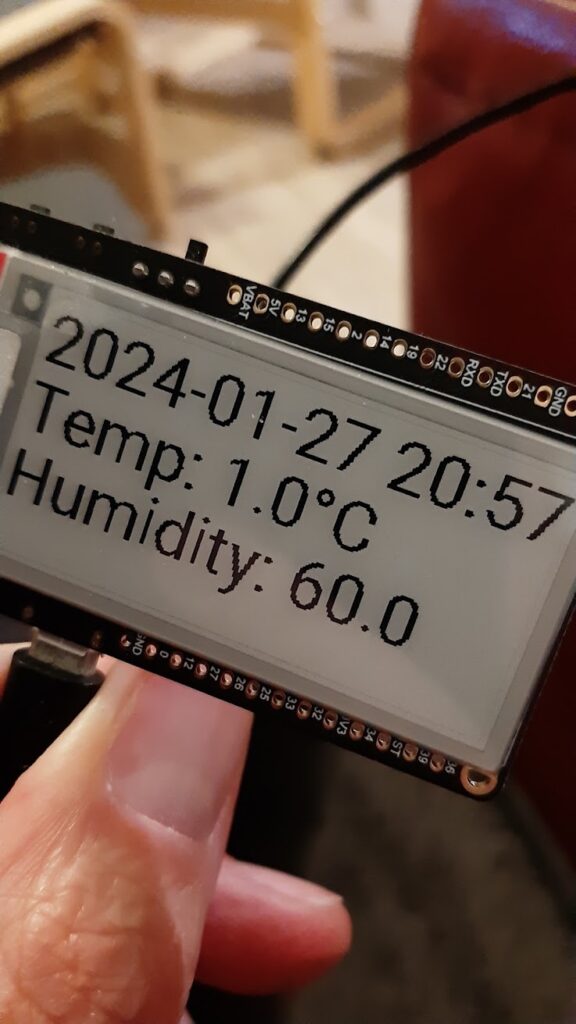
it.strftime(0, 0, id(roboto2), "%Y-%m-%d %H:%M", id(homeassistant_time).now());
it.printf(0, 33, id(roboto2), "Temp: %.1f°C, %.1f°C", id(outside_temperature).state, id(outside_temperature_button).state);
it.printf(0, 66, id(roboto2), "Humidity: %.1f%%", id(outside_humidity).state);
The first part of the code (spi, display…) is for the screen initialization and setup.
The ‘lambda’ part of the code is for writing out the text.
The first it.strftime… line outputs the current date and time. How to get time from HA? See below.
The second it.printf… line outputs temperatures from my sensors pulled from Home Assistant (will explain later).
The third it.printf… line outputs outside humidity from the weather integration pulled from Home Assistant (will explain later).
I used the following instructions to learn about lambda, outputting, formatting: ESPHome1(print), ESPHome2(fonts), ESPHome3(sensor values from HA).
Getting time from HA
time:
  - platform: homeassistant
    id: homeassistant_time
Getting sensor values from HA
Getting sensor values from HA is easy. Firstly, I went to HA / Settings / Devices / Entities, searched for my sensor and copied its name (Entity ID):
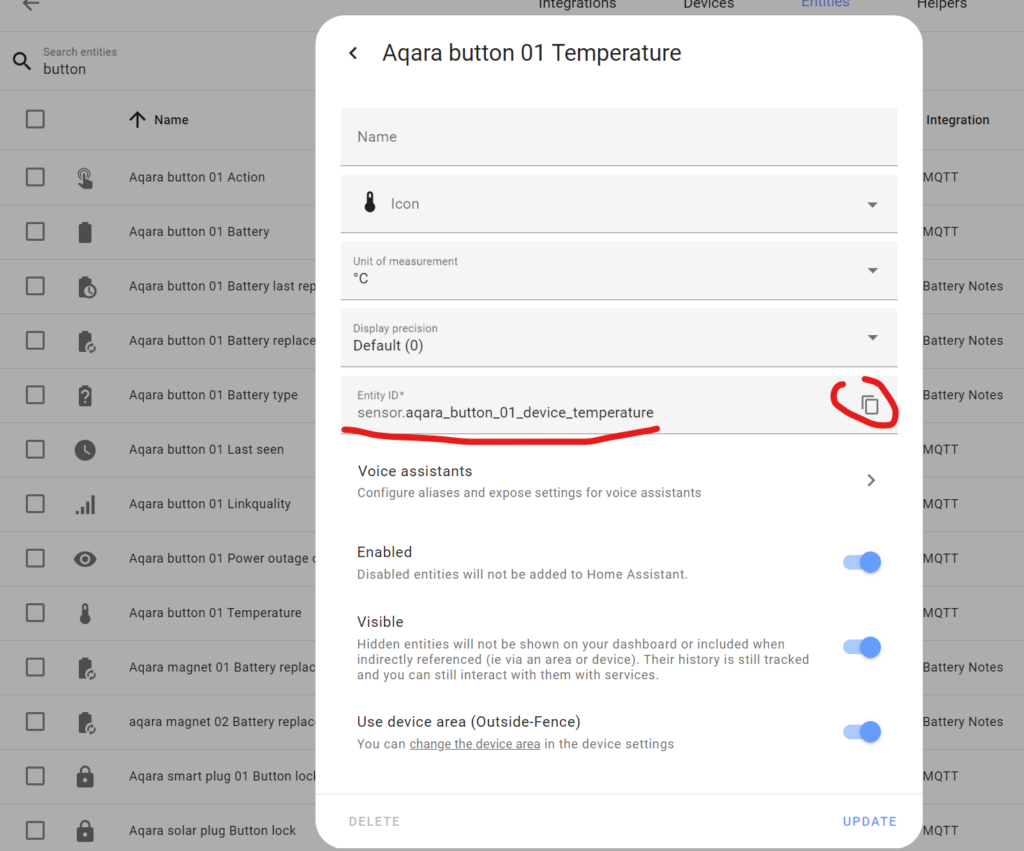
Then I used entity name in ESPHome yaml:
# Pull data from Home Assistant
#from toplotna
  - platform: homeassistant
    name: "Outside temperature Sensor From Home Assistant"
    id: outside_temperature
    entity_id: sensor.toplotna_outside_temperature

#from Aqara button
  - platform: homeassistant
    name: "Outside temperature Aqara button Sensor From Home Assistant"
    id: outside_temperature_button
    entity_id: sensor.aqara_button_01_device_temperature

# from weather integration
  - platform: homeassistant
    name: "Outside humidity from Home Assistant"
    id: outside_humidity
    entity_id: weather.forecast_morje
    attribute: humidity
id: name of the variable that can be used in YAML code elsewhere (when printing)
entity_id: name of the entity from Home Assistant.
I used entity state value (first 2 entities – temperatures) and attribute value (3rd entity – humidity).
To get the attribute name, I went to HA / Developer tools / States /
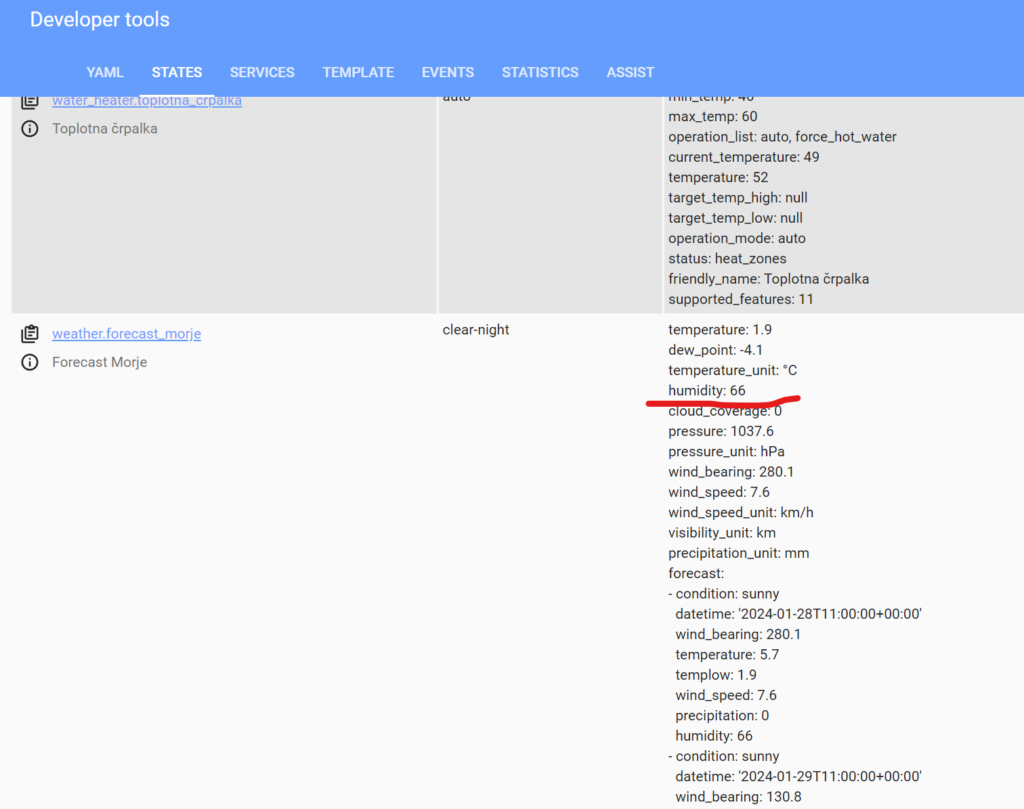
I don’t have an outside humidity sensor, so I used the nearest weather station humidity value. Good enough 🙂
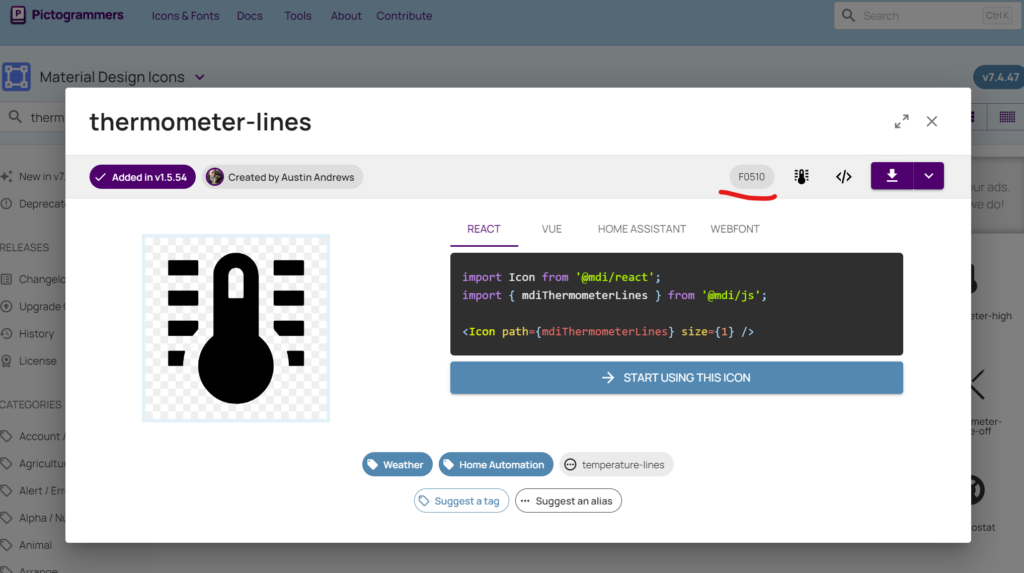
Looks good, but I want it nicer. For example, I want glyphs (mdi: … ) images for temperature and humidity. Like those:

Again, searched a bit and found these gems:
- Glyphs: https://pictogrammers.com/library/mdi/
- Downloadable from Github
- Community instructions on how to use glyphs in ESPHome
So I downloaded glyphs (materialdesignicons-webfont.ttf) from Github, uploaded it to HA, modified ESPHome yaml code and added font definition:
  - file: "_fonts/materialdesignicons-webfont.ttf"
    id: material2
    size: 32
    glyphs:
      - "\U000F0510" # mdi:thermometer-lines
      - "\U000F058E" # mdi:water-percent
And the output:
it.printf(0, 33, id(material2), "\U000F0510");This line of code prints the thermometer glyph before the sensor value.
Where did I get the Unicode number of glyph? Here:
Final result:
Leave a Reply