(#WatchYourLAN)
If you read this on fediverse and the layout is off, here’s the link to the original blog post with a nice text & pictures layout.
The problem:
I’m just curious what is connected to my home network, because it’s over 30 devices. Some have static IPs, some dynamic. I don’t recognize devices by their IPs anymore.
The solution
There are many solutions to this. The most obvious solution is not being paranoid about it, so no tool is needed.
Then, I could edit the ARP table on my ISP modem. But because it’s not my device, I don’t like to edit it too much.
The second possible solution is to edit/rename client list on #PiHole and give meaningful names to IPs. I tried once but I forgot why I didn’t like the solution.
Now I found out about #WatchYourLan tool. I installed it and after few days, it seems quite nice.
The process:
WatchYourLan needs Docker to run(update: not necessariy, see comments below). I have ‘only’ Proxmox running in my homelab and I wanted to use it also for this server. So I installed Docker in LXC on Proxmox. Which is kind of stupid. A container within container. The usual way is to install the #Docker in #Proxmox’s VM. But I don’t want to dedicate the whole VM to this ‘simple’ task.
- Install Docker in Proxmox’s LXC
I just followed this fine video: https://www.youtube.com/watch?v=hDR_1opHGNQ
To sum it up, just create a new #LXC, go to Options/Features, check keyctl on, nesting on. Why? I have no idea, I’m just following some random internet instructions.

I used Ubuntu server as a template when creating LXC, so the instructions in the video above are not quite right (they’re for Debian). So I followed the following instructions to install the Docker in Ubuntu LXC:
https://docs.docker.com/engine/install/ubuntu
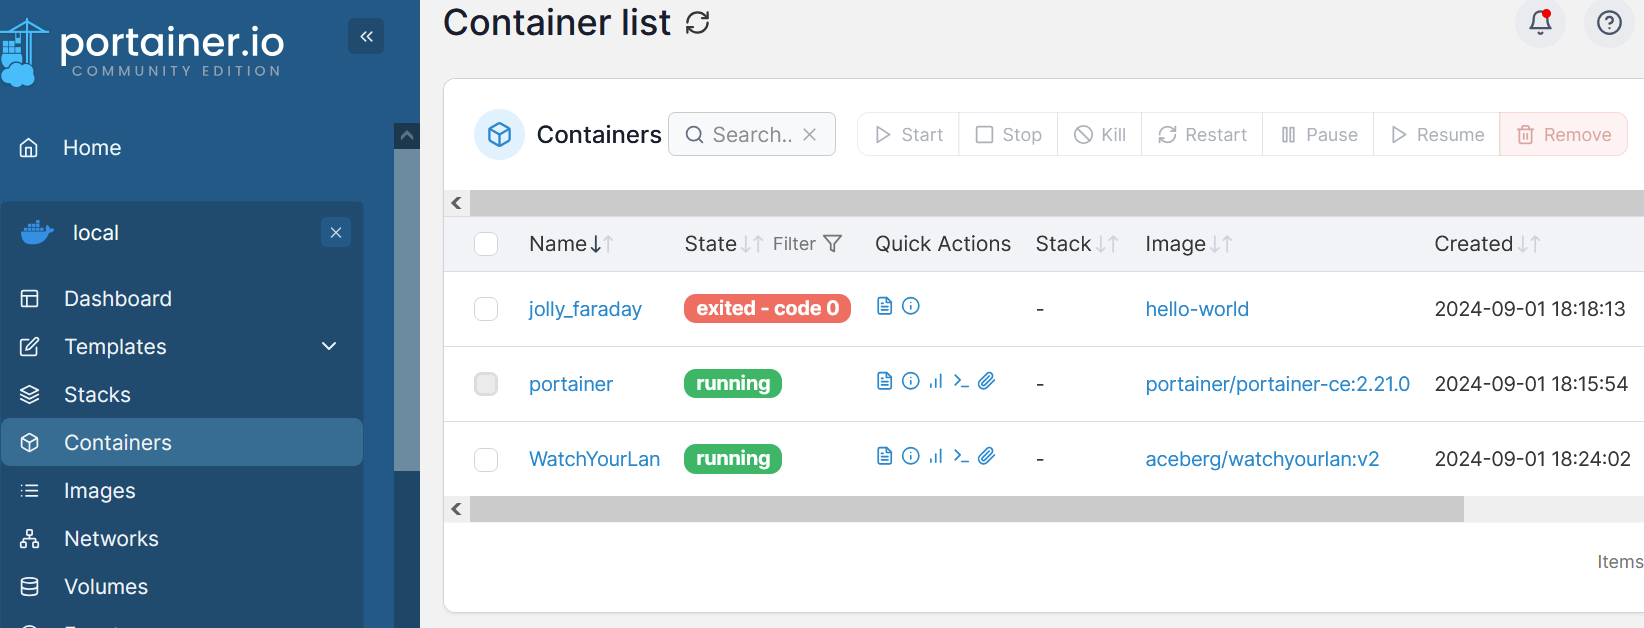
2. I added Portainer, just for the sake of it. And to run/stop WatchYourLan, because I always forget command line commands to do it.
docker run -d -p 8000:8000 -p 9443:9443 --name portainer --restart=always -v /var/run/docker.sock:/var/run/docker.sock -v portainer_data:/data portainer/portainer-ce:2.21.0
3. Install WatchYourLan
https://hub.docker.com/r/aceberg/watchyourlan
I wanted to install it using Portainer, but I didn’t know how, so I just used commad line to start it up:
docker run --name WatchYourLan -e "IFACES=eth0" -e "TZ=Europe/Amsterdam" --network="host" -v $DOCKERDATAPATH/wyl:/data/WatchYourLAN aceberg/watchyourlan:v2 After that, Portainer sees it and I can control it via Portainer’s web UI.
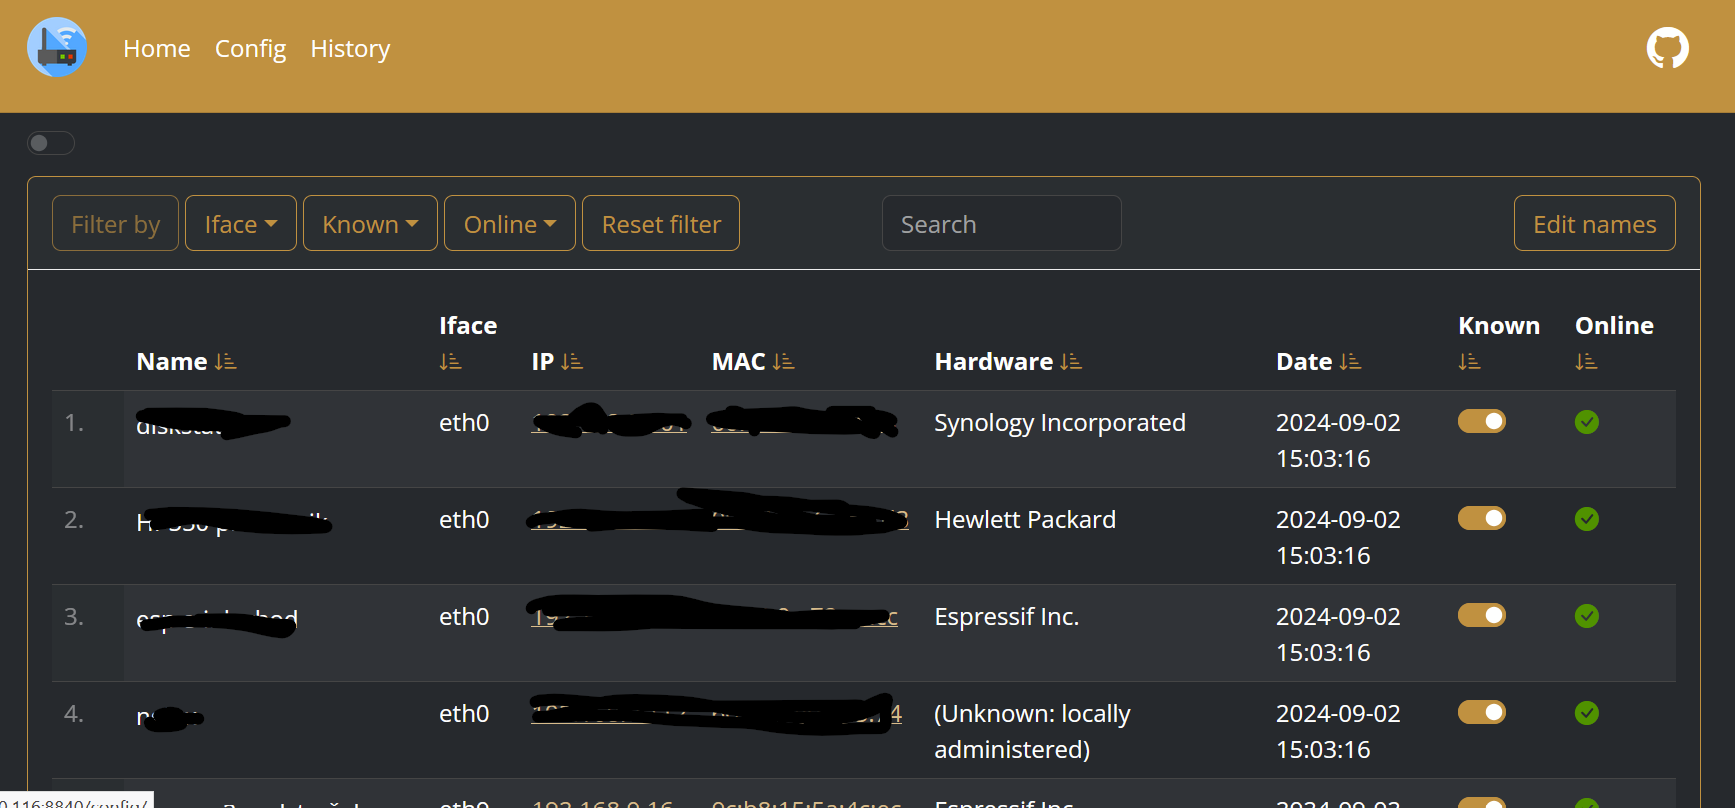
WatchYourLan is accesible at the adress: localhost:8840.
Then I set names to all devices. It took me quite some time to sort out 40 devices.

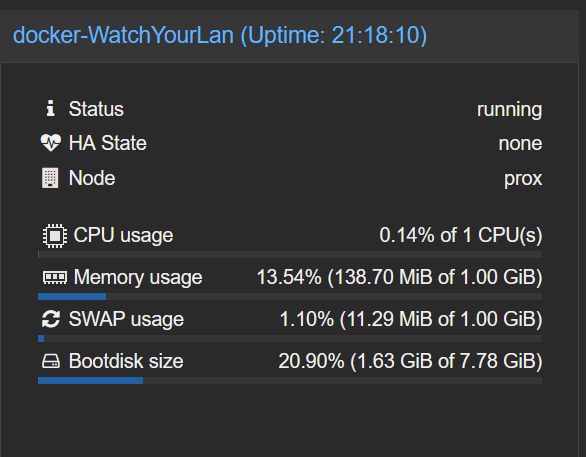
4. It is really a low-resource tool:

5. But what can I do with it?
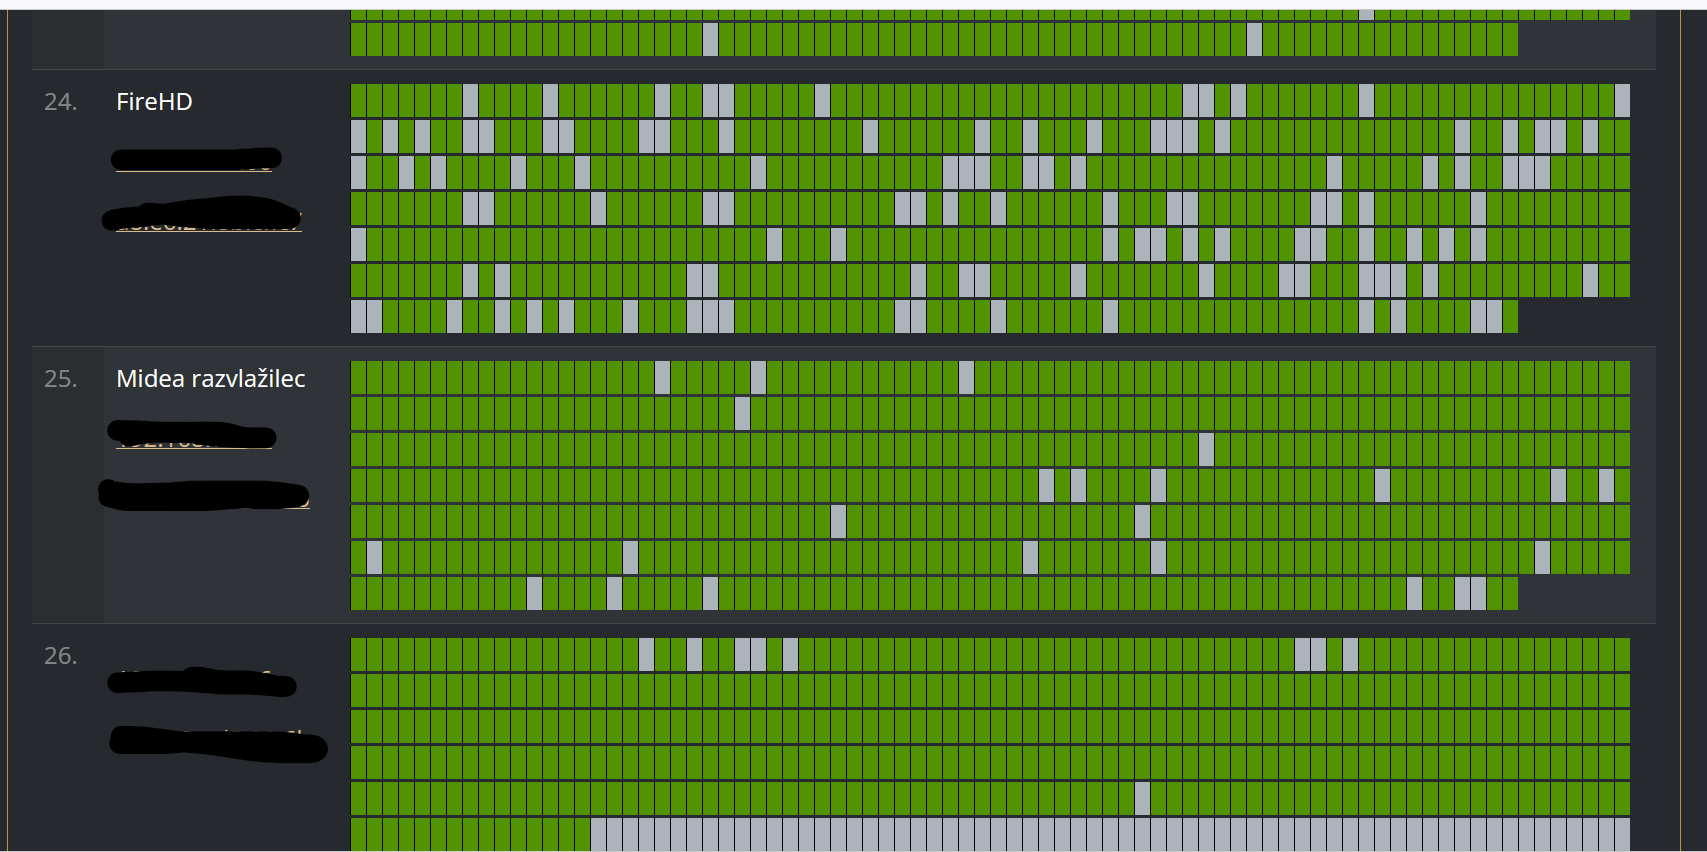
The most useful thing this tool provides is the following:

This image is an overview of the connection dropouts (green-online, grey-offline). For the first time I saw my FireHD tablet frequently drops the connection, which is probably the reason why it doesn’t wake up always when Home Assistant sends it a command to wake the screen up.
6. Lastly, I added it to Home Assistant via Proxmox integration:

Key takeaways
WatchYourLan is a perfect tool if you’re paranoid and want to know who is on you network.
Leave a Reply