Flashing Xiaomi BLE sensors and integrating it in Home Assistant
There is no such thing as ‘too much’ temperature and humidity sensors, right? So I bough another 5 Xiaomi Mi BLE sensors (in Nov. 2024) model LYWSD03MMC. I wanted to flash them OTA (over-the-air) with custom firmware as previous 7 sensor (bougth in 2022-23).
But why would I want to flash it with custom firmware? To connect it to my Home Assistant, of course. Stock firmware connects only to Xiaomi phone app.
But not so fast.
After I bought the sensors, I found out that OTA using the web flasher currently doesn’t work. Xiaomi updated the sensor’s firmware (2.1…), closed the loop hole and it can not be ‘activated’ and then flashed over-the-air anymore [see the debate on GitHub].
But smart people of internetz found the way to flash it via serial connection, usb2ttl adapter and some wires. Only the first flashing should be done with serial adapter. After that, OTA works again.
The process
I downloaded this firmware: ATC_Thermometer.bin (rel. 79)
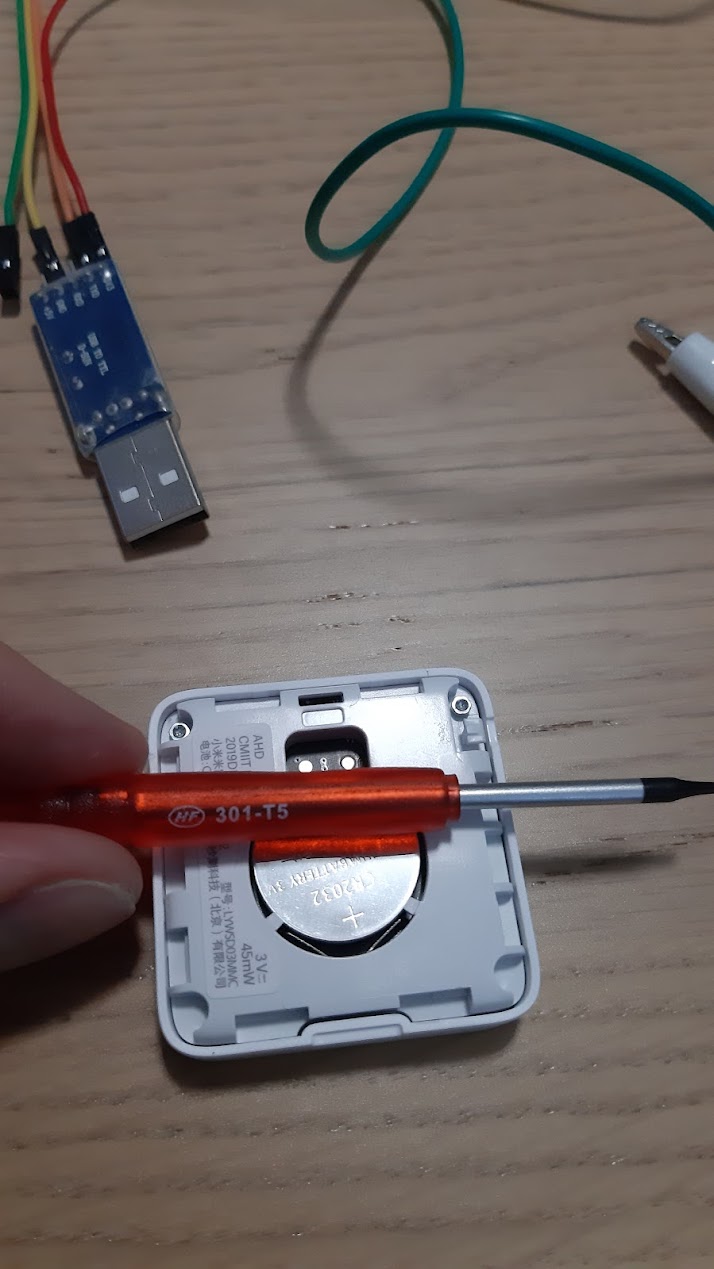
I dissasembled the device (T5 torx screwdriver):

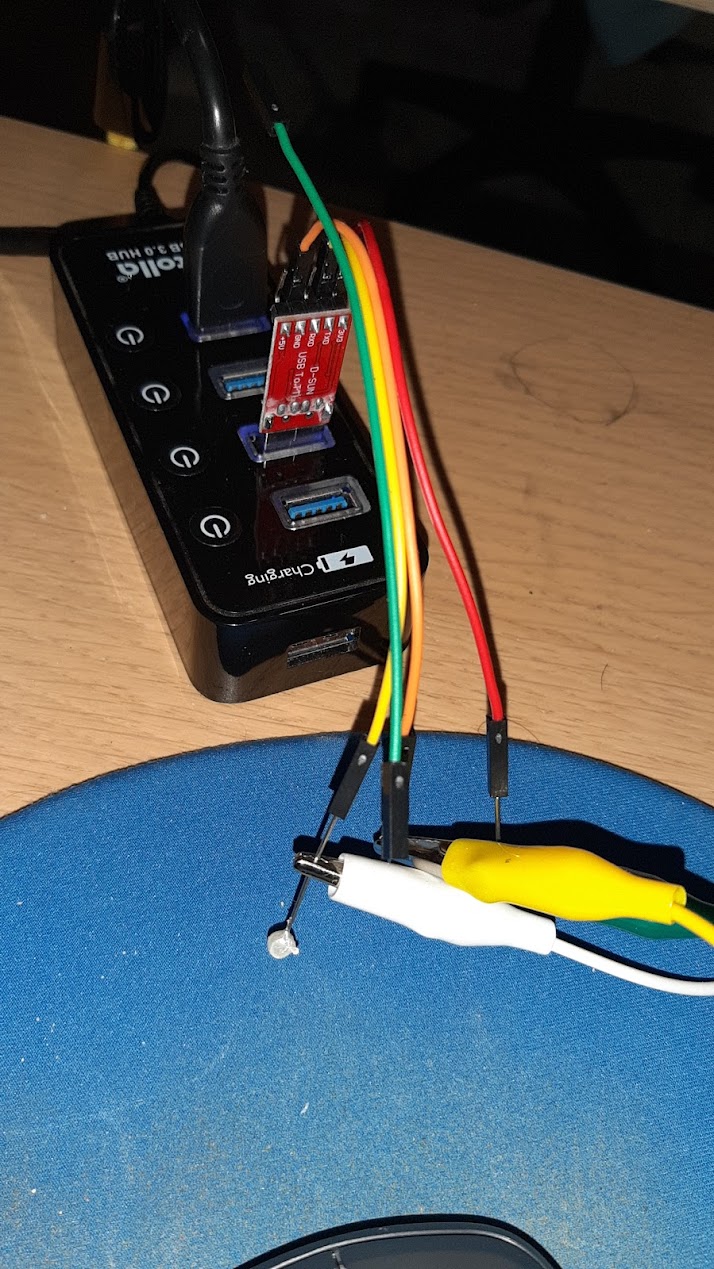
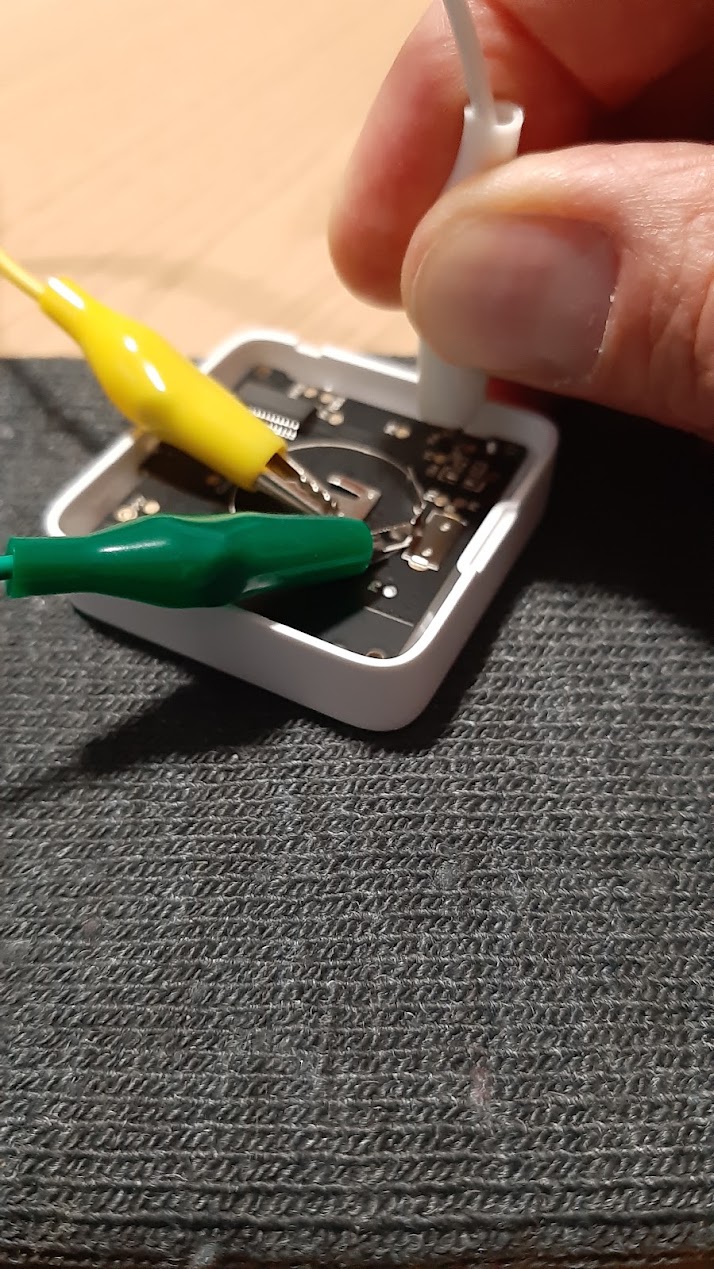
I connected DuPont wires to the USB2TTL adapter, the wires with crocodile clips to DuPont wires via some pins. I didn’t match the colours of the wires so I had to check 10 times which wire goes where. Amateur forever.
Moreover, I bought 3 slightly different usb2ttl adapters in a pack (in 2023) and only one (dark blue one, HW-597) worked for this specific flashing.

Then I connected:
USB2TTL adapter | Xiaomi sensor
GND –> battery middle connector (-),
+3V –> battery side connector (+),
Tx –> P14 (just held the white wire to the P14 dot while flashing, no soldering needed).

I used this serial flasher (works in Chrome, not in FireFox). All settings default.

After flashing (30 secs), I disconnect the cables, assembled the device and put the battery in.
When assembling the back side, you have to press it hard on 3 sides to hear ‘clicks’ on each side. Otherwise the board will not have a good contact with LCD display.
I observed the MAC address rotating at the startup and wrote it down:
MAC: A4:C1:38:XX:YY:ZZ
The first 3 numbers are always the same for all LYWs… sensors.
Opened the OTA Telink flasher. Clicked ‘connect’. A new window with BLE devices shows up. Select the correct device.
Then I configured it with the following settings:
- Smiley: Comfort indicator
- advertising: custom
- Adv. interval: 1 min
- Show battery: Enabled
- Sensor instant advertising: temp 0,5 alarm, humi 5% instant alarm
- Save current settings to flash
Then I went to Home Assistant ESPHome add-in and opened the yaml of my BLE proxy. Added the following code for each sensor:
...
sensor:
...
- platform: atc_mithermometer
    mac_address: "A4:C1:38:XX:YY:ZZ"
    temperature:
      name: "ATC 11 (ROOM NAME) Temperature"
    humidity:
      name: "ATC 11 (ROOM NAME) Humidity"
    battery_level:
      name: "ATC 11 (ROOM NAME) Battery-Level"
    battery_voltage:
      name: "ATC 11 (ROOM NAME) Battery-Voltage"
    signal_strength:
      name: "ATC 11 (ROOM NAME) Signal"
...
Saved, installed new firmware to my ESP32 BLE proxy.
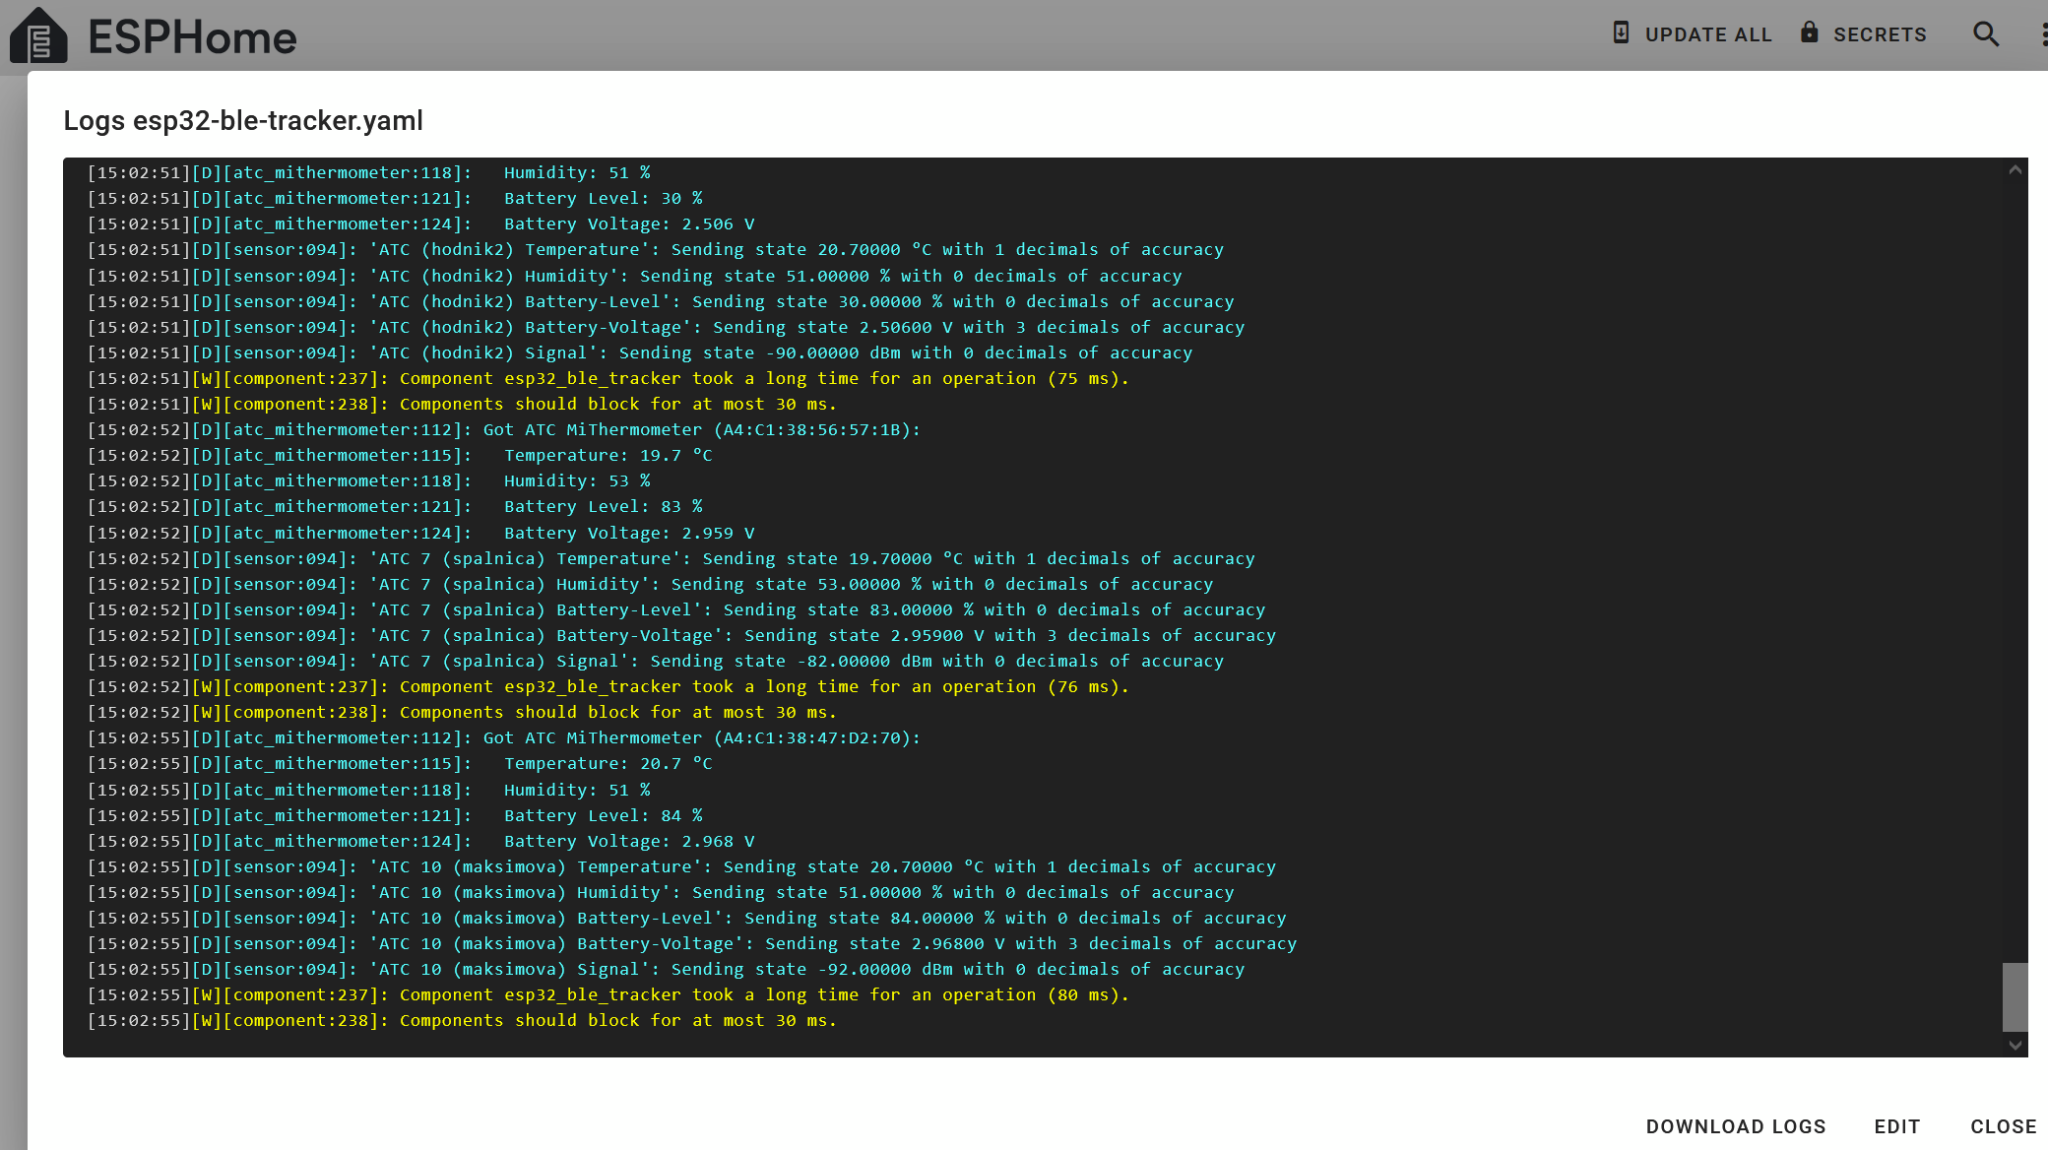
Checked the ESP32 logs to see if it receives BLE data from new sensor:

All good!
Then I opened ESPHome integration in Home Assistant to check if new entities appeared. They have.
Looks like my ESP32 (Wroom, 2 core) can handle 11 Xiaomi BLE sensors + 1 BLE hand band (almost) without problems.
It outputs a yellow warning “… tracker tool a long time for an operation – 80ms“, but it isn’t noticable from HA perspective.
Integration to Home Assistant
No additional work here to be done. ESPHome integration adds the new entities from ESP32 BLE tracker automagically.

I’ve put one of my sensors to the attic, because I was always curious what’s the temperature there in winter and sommer. Moreover, I was interested in the difference of outside temperature and attic temperature.
The blue line is the attic temp., yellow and red are the outside temps:

What’s interesting is a phase shift of temperatures. Attic temp. follows outside temp. with small delay (2-3 hrs).
On average, attic temp is only 2-5C higher than outside temp. It’s not surprising, because there is 30cm of insulation on the attic floor.
Calculating difference of 2 temperatures
How did I calculated the difference of temperatures?
I’ve created a new helper, template sensor and entered the following code in template options/state template field:
{{ (states('sensor.atc_11_podstresje_temperature') | float(2) - states('sensor.toplotna_outside_temperature') | float(2)) | round (1) }}
TL;DR
- Xiaomi MI BLE sensors are quite reliable, I use them for 2-3 years without issues
- Flashing with serial adapter is not so difficult as I thought, no soldering is needed
- Battery lasts almost a year
- Didn’t try to flash them with zigbee firmware yet. As I read, it drains the battery faster and I don’t see any advantages over BLE.
Tags: #homeassistant #xiaomi #ble #esphome #esp32 #temperature #humidity
If you’re reading this on fediverse or RSS feed and the layout (embedded pics) is off or missing, here’s the link to the original blog post.
Leave a Reply